Improved paths and tracks: Part 3
Practical Action
Marking the route
The new route can be set out on the
ground using wooden pegs and a
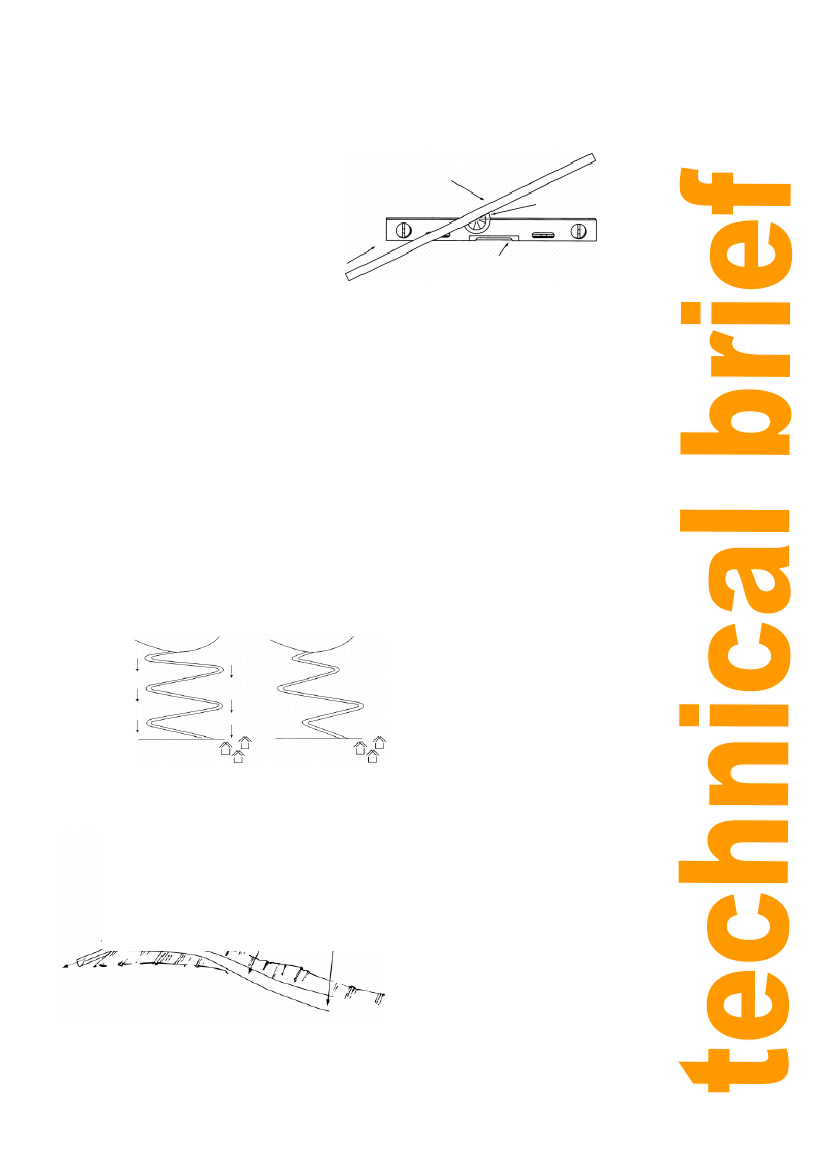
clinometer. A clinometer is a small,
hand-held instrument with an eyepiece
through which the angle of the line of
sight can be read off. A simple, but
effective clinometer can be made with a
spirit level, straight pole and plastic
protractor, as shown in Figure 2.
Straight wooden
pole about one
metre long
Measure angle with
protractor
Spirit level
It is most important to walk carefully the
whole of the marked-out route to inspect Figure 2: A simple clinometer
for hazards and obstacles, such as
gullies, unstable soils, and areas of hard rock. Time spent in adjusting and refining the route
at this stage can save a lot of time and effort later. It is particularly important to look at the
slope from the top downwards, as it is usually easier to spot potential difficulties from above.
Zig-zags
Reducing the gradient on long, steep slopes often requires the construction of a series of zig-
zags. These are sections of gradient alternating in direction up the slope, called ‘limbs’,
joined by sharp bends, called ‘hairpins’. There are a number of points to bear in mind with
regard to the arrangement and details of zig-zags. Repetitive limbs of the same length
between hairpins are not recommended, as each hairpin will discharge directly onto the
hairpin below, creating drainage problems. Also, it can encourage users descending the path
to cut across between the hairpin bends, further exacerbating slope erosion. Varying the
length of the limbs, as shown in Figure 3, is the preferred arrangement.
Not recommended
Water gullies
develop between
bends
Recommended
Figure 3. Vary the length of the limbs to prevent
gullies
Gradient around
hairpin 5% or
less
Drainage
discharge
Hairpin
bend
Upper limb
Increased
gradient
Normal gradient
Lower limb
Hairpin bends
The setting-out and
construction of hairpin bends
is one of the trickiest
operations in path and track
improvement. They are the
points that are most
vulnerable to erosion, and
should always be positioned
on a stable part of the slope.
The turning area needs to be
fairly flat, and the least steep
part of the slope should be
chosen if heavy earthworks are
to be avoided. The gradient of
each limb should be
increased (made steeper) just
before and just after each
bend where possible. This
discourages people from
cutting across the inside of
the bend. Typical details are
shown in Figure 4.
Figure 4: Layout of hairpin bend
2